 Vidova
How to turn screen recordings into product tutorials automatically
Turn product walkthroughs into tutorials and help-center videos at volume: cut dead time, zoom on clicks, add captions, voiceover, chapters and vertical cuts.
 Vidova team
Last updated
The short answer
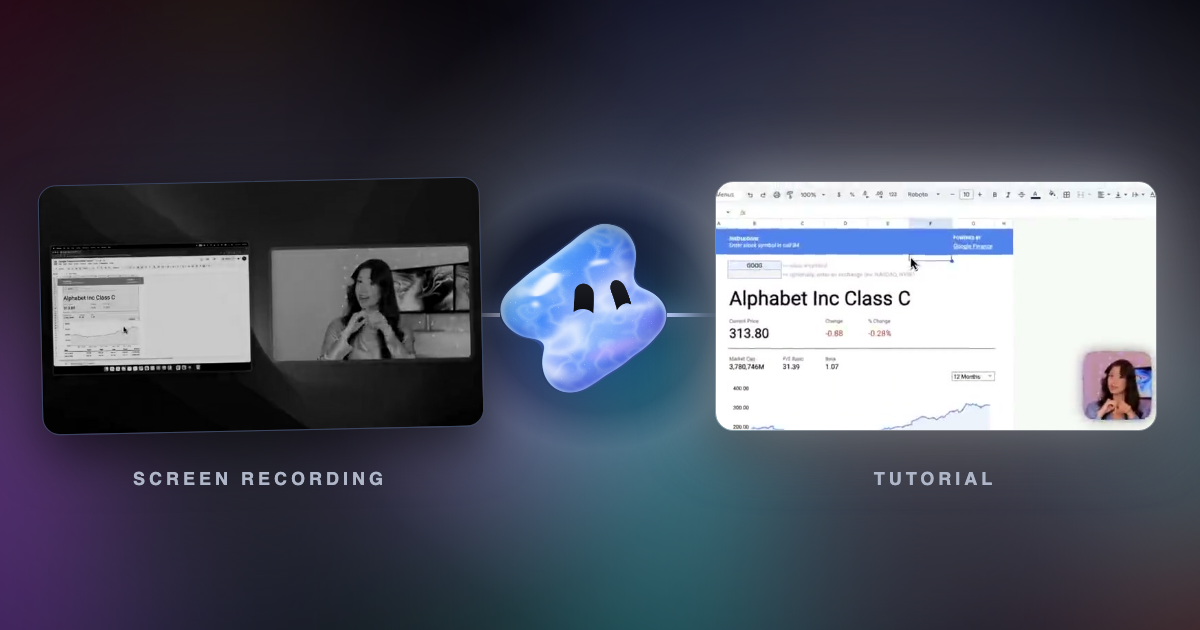
Record each walkthrough with a recorder that saves your clicks, cursor and camera as data, not only pixels. An editor can then cut the pauses, zoom in on clicks, write captions, split chapters and make a vertical cut without hand editing. Vidova Recorder does this after every take on macOS, Windows and Linux. To make many tutorials, record and upload with the Vidova CLI and give an AI agent one brief for every project.
Key takeaways
- Record with a tool that saves clicks, the cursor and the camera as data. A plain video file holds only pixels.
- Vidova Recorder cuts pauses and filler words, zooms on clicks, writes captions and splits chapters after each take, on macOS, Windows and Linux.
- For recordings made in other apps, the free auto zoom tool finds the cursor and the clicks in the picture.
- For volume, record and upload from the Vidova CLI with JSON output, then give an AI agent one brief for every project.
What a tutorial needs, and what can be automatic
A raw walkthrough becomes a tutorial through the same steps every time. Each step can run without hand editing, as long as the recorder saved the data it needs.
| Step | What it needs | What Vidova does |
|---|---|---|
| Cut dead time | A transcript with a time for every word | Finds pauses and filler words such as um and uh in the transcript and cuts them |
| Zoom on clicks | The clicks and the cursor path, saved while you record | Zooms in on bursts of clicks and moves a smooth camera with the cursor |
| Captions | Speech to text | Writes captions you can correct word by word, in a style you choose |
| Voiceover | Your recorded voice, or a script | Keeps your narration, or generates a voiceover from the exact script you give |
| Chapters | The walkthrough split into steps | Splits the video into titled sections |
| Vertical cut | A reframe that follows the action | Makes a 9:16 version that follows the zooms when you ask for it |
| Export | Files for the site, the help center and editors | MP4, Premiere Pro FCPXML or DaVinci Resolve OTIO |
Every automatic edit lands on a timeline as its own clip or track, so you can keep, change or undo it before you export (Vidova Recorder).
Record so the automation has data
A video file holds pixels. It does not know where you clicked. Vidova Recorder saves the cursor position, every click and the keys you press next to the picture, and records the camera as its own track. How the zoom rules use that data is in how automatic zoom screen recording works.
- Record one window, not the whole display. Pick it in the recorder and check its name and size before you start.
- Set the defaults once in Settings, then Recording: 24, 30 or 60 fps, a capture width of 1280, 1920 or 2560 pixels, and a 3 or 5 second countdown.
- Keep cursor tracking on. Turn keystroke tracking off when keys are not part of the tutorial, and do not type private information during a take.
- Read your script from the teleprompter, at 60 to 320 words per minute.
- Pause and stop with the global shortcuts while the product stays in front: Option + Shift + Cmd + P to pause and Option + Shift + Cmd + S to stop on macOS, and Alt + Shift + Ctrl with the same keys on Windows and Linux.
How to plan the path, prepare a demo account and write the script is in how to record a polished SaaS product demo.
Recordings you already made in another app
Tutorials recorded in QuickTime, OBS, Loom, Zoom or the Windows recorder have no click data. The free auto zoom tool works from the picture instead. It finds the cursor on every frame and reads a click as a place that changes under a cursor at rest. It zooms in to 1.8 times on each click, clicks close together share one zoom, and each zoom follows the cursor. A recording with no click gets no zoom, and a phone recording has no cursor to follow.
Without signing in, it zooms the first 10 seconds of a recording, twice a day on one device, with the Vidova mark. With a Vidova account, a recording can be up to 10 minutes long and uses your plan's credits. Open the result in the editor to move, lengthen or remove a zoom.
For captions only, the free auto subtitle generator writes subtitles from the speech, lets you correct the lines and downloads an SRT or VTT file. Only the sound leaves your device.
Narration: keep it, fix it or generate it
The simplest narration is your own voice, recorded with the take. Fix wrong words in the captions, not in a new take: tell the agent the wrong words and the right ones, such as "In the captions, change 'Vidoba' to 'Vidova'". The corrected words keep their times, and the recorded voice does not change.
For a take recorded without a microphone, write the script and ask for a voiceover. Vidova's docs ask for the exact words in quotation marks and the voice you want. Speech is charged by the number of characters. The free text to speech tool makes a voiceover from text without opening the editor.
A help center in several languages needs each tutorial in each language. With the speaker's consent, Vidova can clone their voice from a clean stretch of their speech and lip-sync a translated line, as how to make UGC ads with AI shows.
Make tutorials at volume
One tutorial is a recording and an edit. Fifty tutorials need the same steps without clicking through each one. The Vidova CLI records and uploads from the terminal, so a script can do both:
vidova record --no-prompt --window "Acme Admin" --mic "MacBook Pro Microphone" --duration 120 -o invoices.vtape
vidova upload invoices.vtape --new-project "Tutorial: send an invoice" --wait --json > invoices.json
With --no-prompt and --window, the recorder captures one named window without questions. With --json, the upload returns structured output and does not open the editor. Check the command's exit status before your script uses the result. The .vtape keeps the screen, camera, cursor and key tracks, so the editor places the same zooms it places for a desktop take. The npm package includes the recorder for macOS and Windows x64, and Linux needs a build from source.
Then give every project the same brief. Connect Claude Code, Cursor or another MCP client to Vidova once (MCP server setup) and ask it to work through the projects:
Open each Vidova project whose name starts with "Tutorial:". In each one, cut the pauses longer than 0.8 seconds and the filler words, keep the zooms on clicks, add captions and fix the spelling of Acme in them, and add a chapter title for each step. Then make a 9:16 version that follows the zooms. Send me the project links.
Inside each project, project variables keep repeated wording and colors the same across clips. Vidova keeps versions of a project, so the 16:9 and 9:16 cuts stay apart.
Export for the help center, the website and social posts
- Help center and website: a 16:9 MP4 with the captions in the picture. For a player that loads caption files, make an SRT or VTT file with the subtitle generator.
- Reels, TikTok and Shorts: a 9:16 cut at 1080 × 1920. Sizes for each app are in video sizes for Reels, TikTok, Shorts and YouTube.
- A final pass by an editor: Premiere Pro FCPXML or DaVinci Resolve OTIO, as described in exporting and sharing.
The recorder is free to download, and you can record without an account. AI edits in the editor use your plan. Paid plans start at $19 a month, remove the watermark and export up to 4K at 60 fps.
Other tools built for tutorials
Two other tools aim at the same job from different angles. The facts come from their own pages, checked 7 November 2026.
| Tool | How you record | What it makes automatically |
|---|---|---|
| Vidova Recorder | Desktop app for macOS, Windows and Linux, or the CLI | Zooms on clicks, a camera that follows the cursor, silence and filler cuts, editable captions, chapters |
| Loom | Chrome extension, desktop app or mobile app | Titles, summaries and chapters, filler word and silence removal, and a written doc from the video, in 50+ languages. AI voices and avatars are listed as coming soon |
| Guidde | Browser extension, mobile app or desktop app | Step-by-step scripts from the recorded workflow, an AI voiceover in over 200 voices and languages, captions and highlights |
Loom's AI page says an admin turns on Loom AI by moving to the Business + AI or Enterprise plan (Loom AI). Loom also turns a video into a doc you can use to draft SOPs (Loom). Guidde says you can export video tutorials directly into your knowledge base (Guidde).
Loom fits a team that wants a quick video with a written doc next to it, and Guidde fits step-by-step guides with a generated voice. Vidova fits tutorials that need click zooms, your own camera and voice, and a timeline you can keep editing. Recorders with automatic zoom are compared in best screen recorders for product demos, and editing apps for software teams in best video editing apps for startups.
Learn more
Sources
Vidova facts come from Vidova's product pages and docs. The other tools' pages were checked on 7 November 2026.