Connect an AI agent to your video editor with MCP
Learn what MCP connects, how to add Vidova’s remote server to a compatible client, and how to review an agent’s first edit.
Last updated
The short answer
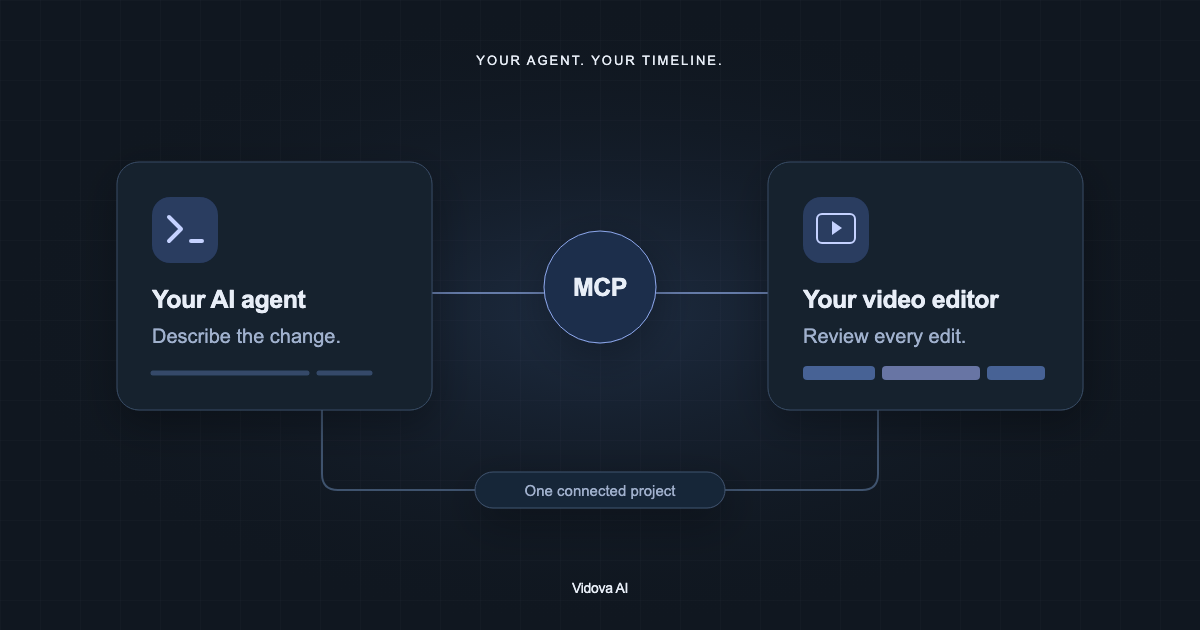
Model Context Protocol (MCP) connects AI applications to tools and data. Vidova exposes a remote MCP server at https://mcp.vidova.ai/mcp. Add that URL in a compatible client, sign in, and keep the signed-in web editor connected for tools that operate through the editor bridge.
Key takeaways
- MCP is a connection standard; it does not guarantee the quality of an edit.
- Use the remote server URL and complete the sign-in flow.
- Ask the agent to read the project before changing it, then review the edit.
What does MCP connect?
MCP is an open standard for connecting AI applications to external systems. A client hosts the assistant, while a server exposes tools and information the assistant can use. For video editing, those tools can connect a conversation to a film, its media, and operations on the timeline.
The client’s model still decides how to use the available tools. Connecting a server gives it access to a workflow; it does not establish that a particular request was completed correctly. You should inspect the actual project after a change.
Connect the Vidova remote server
- Open a client that supports remote MCP servers and its connection settings.
- Add https://mcp.vidova.ai/mcp as the server URL.
- Complete the browser sign-in flow for your Vidova account.
- Open the signed-in Vidova web editor and keep it connected.
- Ask the agent to list your projects and read the one you intend to edit.
The names of connection settings differ across clients. Follow the Vidova MCP guide for the client you use. The remote connection is a URL, not a local desktop command. Tools exposed through the editor bridge require the web editor to be connected.
Make the first edit easy to verify
Begin with a small change to a known project. Ask the agent to identify the source clip and current timeline before making the edit. A read-first request reduces ambiguity about which film or shot you mean.
List my projects and open the interview project I select. Read the current timeline, then tell me which source clip contains the opening answer. Wait for my edit brief before changing it.
Trim the opening answer to the complete sentence between 00:12 and 00:28. Keep the original audio. Add a title reading “The first lesson” above the speaker. Preview the result.
These are example briefs. After the tool calls complete, open the timeline and play the edited sequence. Check the words, clip boundaries, title placement, and sound. Make a focused correction or undo the change if it does not match the brief.
What if the connection is not ready?
Check that you signed in with the account that owns the project and that the editor is open and connected. Authentication and editor connectivity are different requirements. An authenticated client can still be unable to run a tool that needs the editor bridge.
If a call fails, address the reported connection or access problem before requesting more edits. A failed tool call is not evidence that the project changed. Read the project again once the connection works, so the next request starts from the actual timeline.
Continue in the editor
The agent and the editor work on the same project. Use the timeline to inspect changes, use chat for a focused revision, and keep an alternate version when you want to compare directions. Export only after you have reviewed the finished sequence.